So we just completed our first day. We had 5-6 diaper changes with Baby K (I'm tired so I can't count LOL) and doubled up once for nap because he likes to go up to 4 or maybe 5 hours between changes while he sleeps. We did origami fold all day and used 2 covers. The diaper after his bath though I invented a new fold which I will call accordion fold-stay tuned in this picture heavy post for a tutorial. I put him to bed in the accordion fold but trifolded a hemp preflat and laid it on top and then put a microfleece liner on top all of that. The pictures of the diaper ON him have this so it's not as bulky normally as it looks in the pictures but it does add extra layers in the front where a boy especially needs it! Baby K did not poop AT ALL so tomorrow should be interesting-I'm betting on at least 3 poopy diapers-all of which will use a cover (and tomorrow is a BUSY out and about day-Monkey's 3 year doctor's appointment, getting Baby K's birth certificate, store...). Wish me luck!!! I'll also be doing my first handwash day tomorrow. I'm still trying to get our house ready to sell-it was supposed to get listed today so I did 5 loads of laundry, put a bunch away, did dishes twice, scrubbed the kitchen floor for 45 minutes after a good sweeping, cleaned the sinks and mirrors of one of the bathrooms...etc. It was a BUSY day and I'm exhausted-especially since Baby K just BARELY went to bed at 11:35. Good thing I resized most of the pictures during nap time!!! Oh and Monkey is also in a flat for bed with a hemp preflat trifolded and a microfleece liner
Now for the origami with a twist tutorial!
This fold is great because it puts a lot of layers along the whole middle. In our
osocozy unbleached diapers 
I can use this fold on Baby K and Monkey.
 |
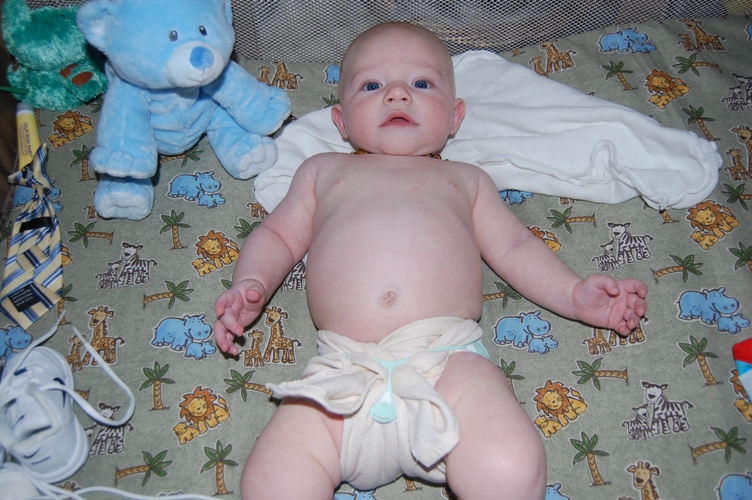
| Baby K and K Bear are all ready to show you how we do our Origami with a Twist :) |
 |
| Start out as usual-diaper in 4ths (as long as it's about 27"x27") |
 |
| Make sure the 1 fold is on the left side and the two folded flaps are at the top and the 4 loose flaps are at the bottom and pick up the top layer of the diaper) |
 |
| Open it up and make a triangle |
 |
| Fold it smooth. If your diaper is completely square it will all line up-mine aren't quite square but it's not a huge deal |
 |
| Flip the WHOLE thing over |
 |
| This is how it looks with the whole thing flipped |
 |
| Take the left side and fold the two parts over once |
 |
| Fold it smooth |
 |
| Fold it over again |
 |
| And a third time (you can just do twice but there won't be as many layers) |
 |
| Now get your baby ready-put it so the point of the whole triangle is towards baby's front |
 |
| Making sure that the back is lined up high enough in the back, bring the front up and around the baby |
 |
| At this point you can fold the front over like this to make the rise shorter if you need to |
 |
| OR before laying the baby on the diaper you can fold the back down like this to help hold breastfed poop in |
 |
| Fold it smooth |
 |
| With the rise folded down in front, back, or both fit the diaper around the thigh like this and fold it up. |
 |
| Another view of the wing folded up around the thigh |
 |
| Now twist the wing |
 |
| Bring it around and hold it in the front |
 |
| Repeat with the other side. Cross the extra wing in front and bring the wing ends down |
 |
| Snappi one side |
 |
| Snappi the other side |
 |
| Bring the snappi down over the cross to secure it in place. Alternatively you can pin through all the layers in the center |
 |
| On the baby-notice how it is really skinny in the hip and there are lots of layers in the hip so the Snappi doesn't scratch him |
 |
| Another view-he's so stinkin cute :). By the way-he's wearing an Inspired By Finn teething necklace-I highly recommend them! |
 |
| Last step-add the cover! With this fold there is VERY minimal tucking but make sure NO part of the diaper is hanging out of the cover-if it is it will leak. Make sure the cover fits well around the back, belly, and thighs and secure. |
 |
| This fold is really trim-even under a onesie. It's not much bigger than a disposable diaper! |
 |
| All dressed up in overalls! |
 |
| Monkey wanted to take pictures with Baby K |
And now for the new fold I invented today. I'm sure it's been done before but I've never seen it. It's similar to a prefold type fold so prefold mamas might really like it. It's really easy. I call it accordion fold because you fold back and forth a bit. This fold would be great for boys. I think you really need a Snappi for it though-I'll show you why at the end.
 |
| Start out with your diaper folded the hot dog way-long and skinny (just fold once) |
 |
| Now bring one side in towards the middle-you can adjust it later where it needs to go to get the maximum amount of layers in the middle |
 |
| Fold the edge of that fold back like you did in grade school with a piece of paper when you folded paper accordions |
 |
| Repeat with other side-bring flap in towards the center |
 |
| Now fold it back out |
 |
| At this point you can fold up the rise and put on baby if you want but it will be a bit wide OR... |
 |
| Fold those edges inside more to make it skinnier and to hold in the breastfed poop |
 |
| I then put it on Baby K. |
 |
| Closer picture-note that this is bulkier than normal because he also has a trifolded hemp preflat AND a microfleece liner to stay dry |
 |
| Here's the issue I mentioned about the Snappi-when you put it on there's an extra little wing you need to secure and I'm not sure that pins will catch it. |
 |
| Another view of it |
It's not perfected yet but I wanted to share. This was the second time doing this fold. If you do this fold feel free to comment with your link! Hopefully this will help some mamas that are having leaking issues with there not being enough layers for boys!


No comments:
Post a Comment